 CODLOCKER
If your aim moves when you let go of the stick, or small movements seem to do nothing, deadzones are a good place to look. A pro’s numbers can give you a reference, but your own controller has to pass the drift check.
Minimum: when input starts
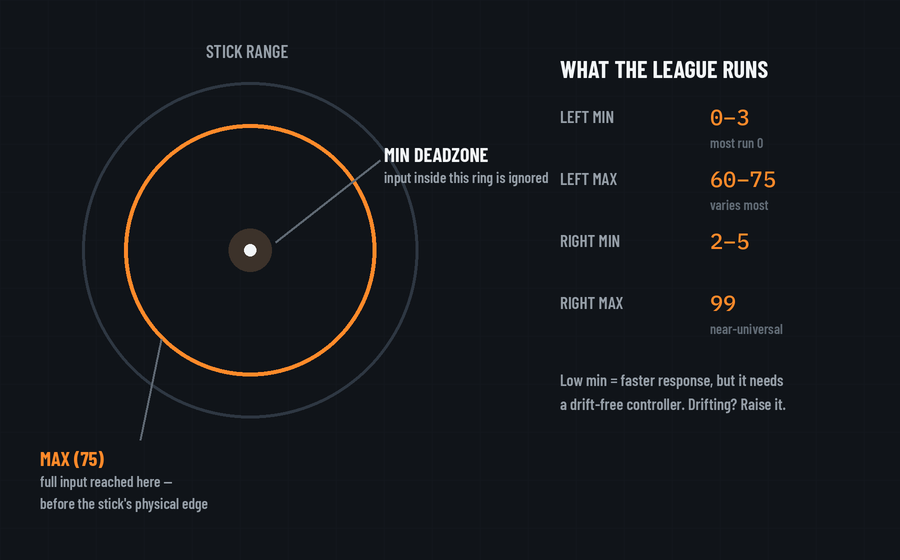
The minimum sets how far the stick must move from its resting position before the game responds. Raising it can stop unwanted input, but it also means you have to move the stick farther before a small adjustment registers.
Start low and let go of the sticks in the game’s deadzone test, if one is available, or in a private match. If the camera moves on its own, raise the right-stick minimum a little. If your character moves on its own, check the left. Test again after moving and releasing each stick a few times.
In the database, 1 on the left and 3 on the right are common. A different number on your pad isn’t a problem if it keeps the controls steady and responsive. The values don’t tell you how old someone’s controller is or whether it has drift.
Maximum: when input reaches full strength
The maximum sets where the game treats the stick as fully pushed. Lowering the left-stick maximum means you reach full movement input with less stick travel. It changes how much you have to push, rather than increasing your top movement speed.
A left maximum of 75 appears often in the BO7 records. The right maximum is generally kept near the end of the range at 99. Try the left maximum separately from the minimum so you can feel what it changes.
Reading the numbers on a player page
L 0/70 · R 3/99 means left minimum 0, left maximum 70, right minimum 3 and right maximum 99. A zero minimum removes the configured inner deadzone; it doesn’t mean the controller has zero latency.
Set the minimums to suit your sticks first. Then adjust the left maximum if you want full movement input to register with less travel. If you replace your controller or notice new drift, check the values again.
The deadzone data article shows how the recorded pro values are distributed.