 CODLOCKER
If you’ve opened a few pro profiles, you’ve probably noticed the same pairing: Dynamic response curve and Default aim assist. They’re common choices in the BO7 records here, but they control different parts of aiming.
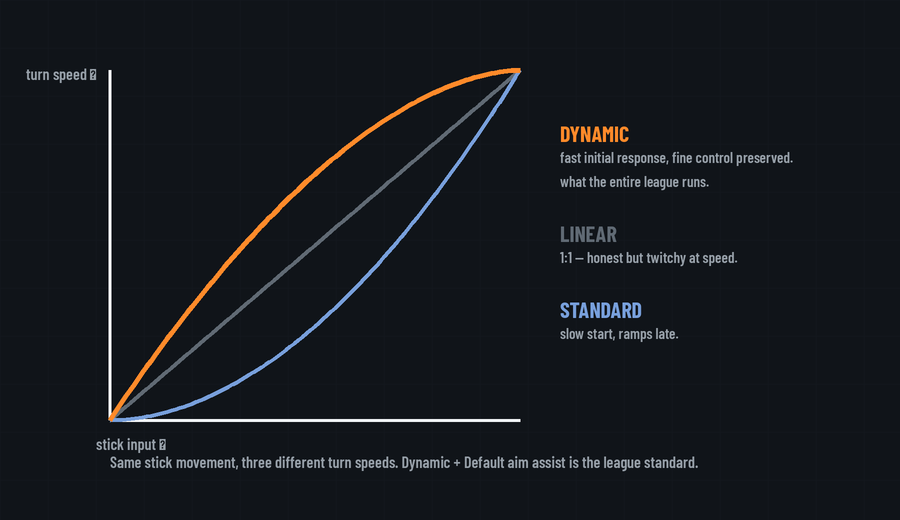
This diagram illustrates the idea of a response curve. It isn’t a measurement of the game’s exact input response.
What the curve does
A response curve determines how your turn speed changes as you push the right stick farther from the centre. Sensitivity sets the overall speed; the curve changes how you reach it.
Linear is intended to give a more direct relationship between stick movement and aiming input. Standard and Dynamic shape that response differently. The difference is something you feel while tracking a target and making small corrections, so a graph alone won’t tell you which you’ll prefer.
Why start with Dynamic?
Dynamic is the recorded choice across the confirmed BO7 profiles on this site. That makes it a sensible starting point if you’re trying a pro setup. It doesn’t mean Standard or Linear is unusable, and popularity doesn’t prove that one curve is best for every player.
If you compare them, leave your sensitivity and deadzones alone. Try tracking a moving target, correcting a small miss and turning between targets. Give each curve enough time that you’re judging the response rather than just the unfamiliarity.
Where aim assist fits in
Aim assist affects aiming around targets. Your response curve affects the way the game reads your stick movement, whether or not a target is there. Switching curves is therefore different from changing aim-assist strength.
Default is the aim-assist option recorded on the BO7 player pages. Use the settings for the game you’re actually playing: menu options and tuning can differ between titles, and beta settings may change.